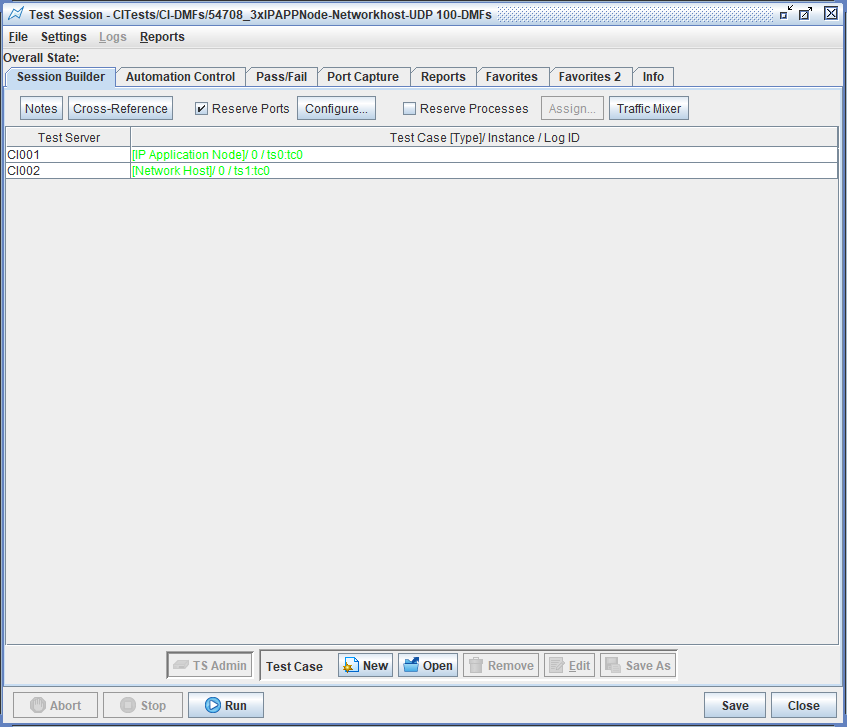
About the Session Builder Tab
Use the Session Builder tab in the Test Session window to add test cases to the test session, define the test duration, manage the test cases, reserve ports and processes, and monitor the progress of the test cases during test operations.
|
Test Case Table/Grid |
You may view and edit parameters shared by multiple test cases in the table, with a column for each Test Case.
You may Validate and Save any changes you made or Cancel, as required. |
||||||||||||||||||||||||||||||||||||||||||||||||||||||||||||||||||||||||||||||||||||||||||||||||||||||||||||||||||||||||||||||||||||||||||||||||||||||||||||||||||||||||||||||||||||||||||||||||||||||||||||||||||||||||||||||
|
The test cases included in the session listed in a grid identifies:
|
|||||||||||||||||||||||||||||||||||||||||||||||||||||||||||||||||||||||||||||||||||||||||||||||||||||||||||||||||||||||||||||||||||||||||||||||||||||||||||||||||||||||||||||||||||||||||||||||||||||||||||||||||||||||||||||||
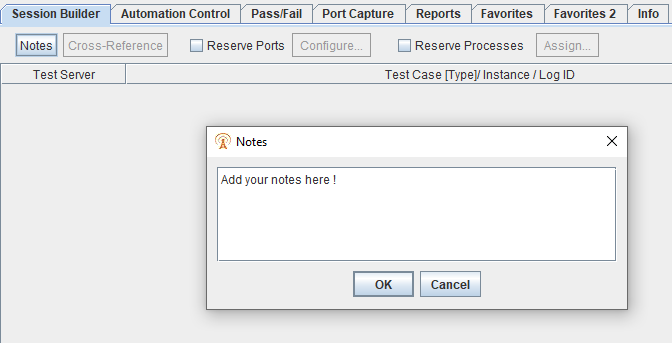
| Notes |
Added a Notes section to the Session Builder Tab. Click on Notes for a Pop-Up window where up to 10K character size can be input and saved successfully. Tcl API "Notes" and REST API: "notes" are supported.
|
||||||||||||||||||||||||||||||||||||||||||||||||||||||||||||||||||||||||||||||||||||||||||||||||||||||||||||||||||||||||||||||||||||||||||||||||||||||||||||||||||||||||||||||||||||||||||||||||||||||||||||||||||||||||||||||
|
Cross-Reference |
Use Cross-Reference to display/view Test Case Parameters shared by test cases in a test session. You may also duplicate tabs, apply auto-increment values across test cases, adjust all numerical values, apply values from other test cases to your selection, and add selection to Favorite tab. The XREF - Test Session window displays relevant test case tabs (e.g., interface tab, network devices tab, test activity tab, configuration tab, and so on) in a table format. |
||||||||||||||||||||||||||||||||||||||||||||||||||||||||||||||||||||||||||||||||||||||||||||||||||||||||||||||||||||||||||||||||||||||||||||||||||||||||||||||||||||||||||||||||||||||||||||||||||||||||||||||||||||||||||||||
| Reserve Ports | Use Reserve Ports to enable and configure ports so that the ports are reserved for specific tests. Click Configure to configure/reserve ports for your tests. | ||||||||||||||||||||||||||||||||||||||||||||||||||||||||||||||||||||||||||||||||||||||||||||||||||||||||||||||||||||||||||||||||||||||||||||||||||||||||||||||||||||||||||||||||||||||||||||||||||||||||||||||||||||||||||||||
| Reserve Processes |
Use Reserve Processes to enable and assign each Group to a particular TS virtual process (for any multiple Groups of Test Cases using the same PHYs). Click Assign to virtually assign processes for your tests.
|
||||||||||||||||||||||||||||||||||||||||||||||||||||||||||||||||||||||||||||||||||||||||||||||||||||||||||||||||||||||||||||||||||||||||||||||||||||||||||||||||||||||||||||||||||||||||||||||||||||||||||||||||||||||||||||||
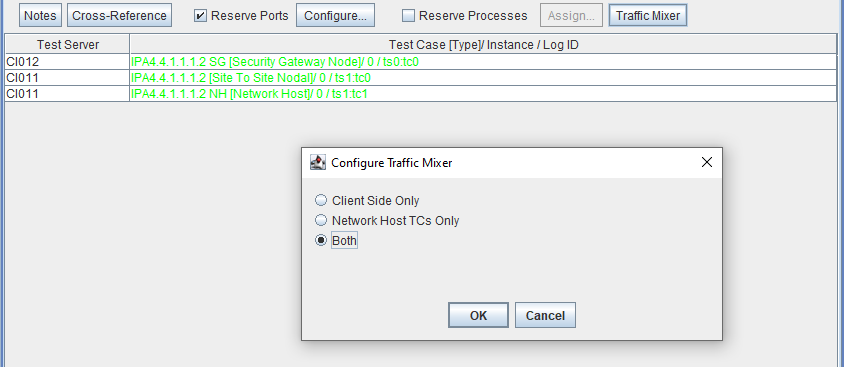
| Traffic Mixer |
Use Traffic Mixer to build a Test Session level traffic mixer that will combine all the Data Profiles from each Test Case (TC) with a Data Profile into one master table of DMFs. Not all DMF protocols are supported by the Traffic Mixer. See this table of all DMFs and their attributes related to Traffic Mixer function and unsupported DMFs are in bold:
When the use clicks the “Traffic Mixer” button, if the Test Session contains any Network Host Test Cases, they will given these options: Client Side Only, Network Host TCs only or Both. When you have both sides in the Traffic Mixer, the data will be double, since it will be showing full traffic Tx/Rx from both sides. If you do attempt to configure the mix with both sides in the Traffic Mixer, remember everything is double. A recommendation is to work each side separately, or even just focus on Client side, save the Data Profile(s) for each Client TC that match up with each Network Host TC and just open the Data Profiles into those NH TCs.
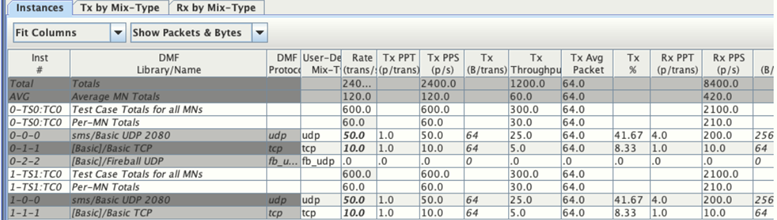
Definitions of rows in Traffic MixerThe left column provides enumerated indication of what the row represents. There are several different row types:
If subflows are involved :
See topics Traffic Rates/Mix and Data Traffic Tab for Test Case specific Traffic Mix. |
||||||||||||||||||||||||||||||||||||||||||||||||||||||||||||||||||||||||||||||||||||||||||||||||||||||||||||||||||||||||||||||||||||||||||||||||||||||||||||||||||||||||||||||||||||||||||||||||||||||||||||||||||||||||||||||
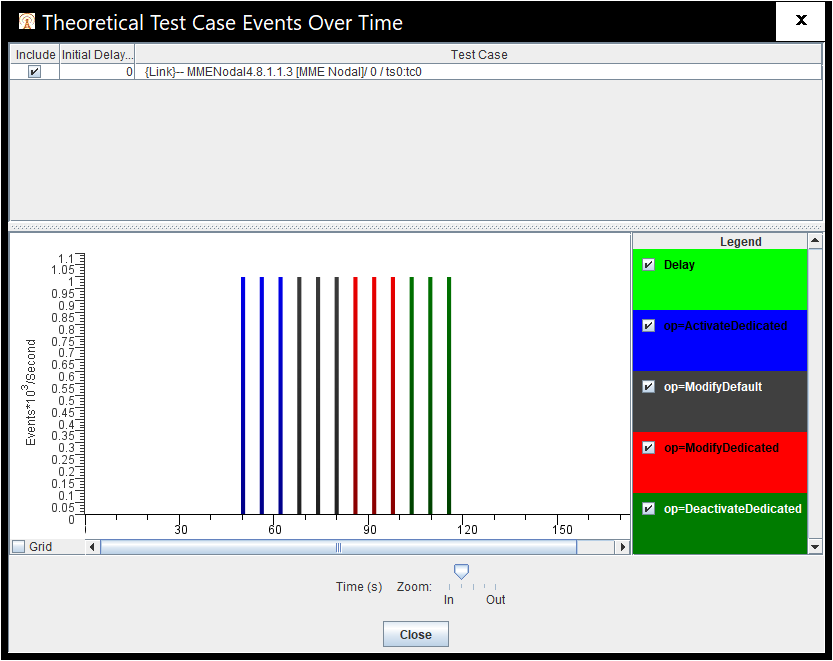
| Mobility Events |
Use Mobility Events to chart Events per Second from the steps defined in the Command Sequencer window. The Mobility Events button appears on Session Builder tab only if the test case uses Sequencer test activity. For example, a sequencer test that Activates Dedicated Bearers, Modifies Default Bearers, Modifies Dedicated Bearers and Deactivates Dedicated Bearers. There need not be Mobility in the test.
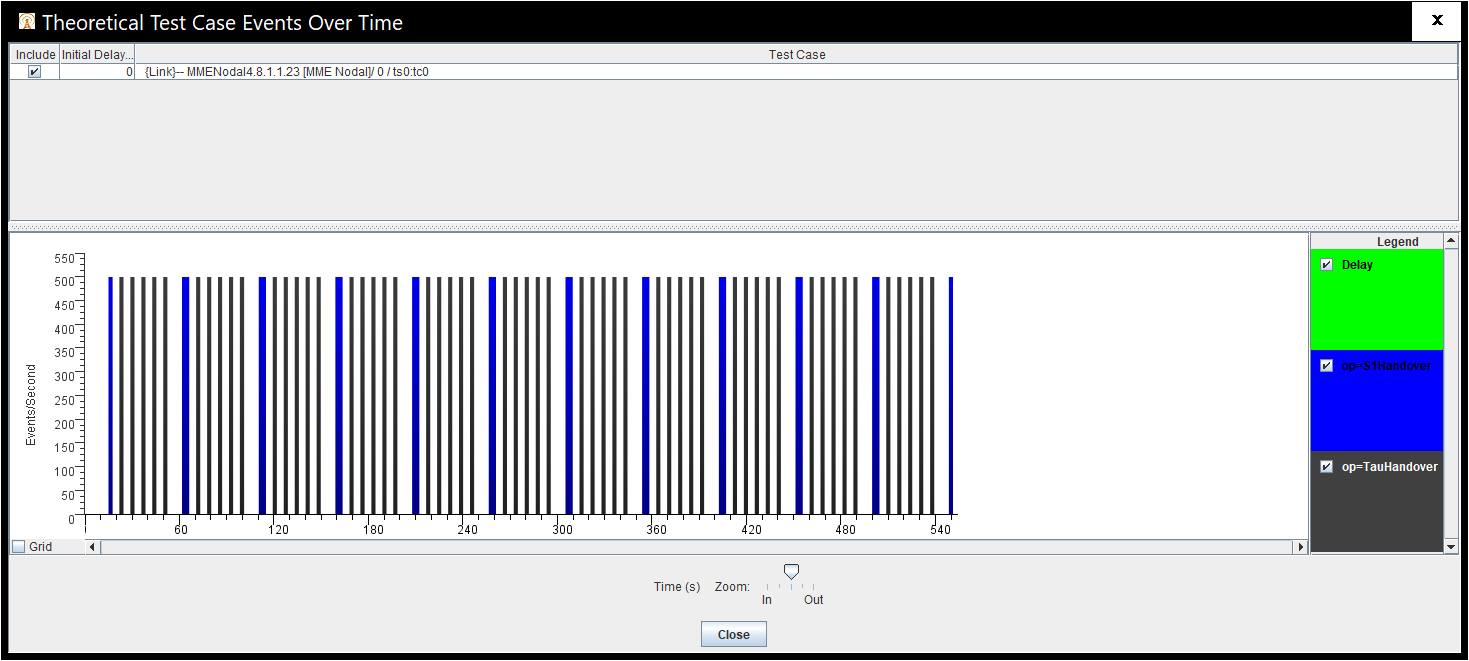
This an example of a sequencer test that does S1 Handover and Tau Handover.
|
||||||||||||||||||||||||||||||||||||||||||||||||||||||||||||||||||||||||||||||||||||||||||||||||||||||||||||||||||||||||||||||||||||||||||||||||||||||||||||||||||||||||||||||||||||||||||||||||||||||||||||||||||||||||||||||
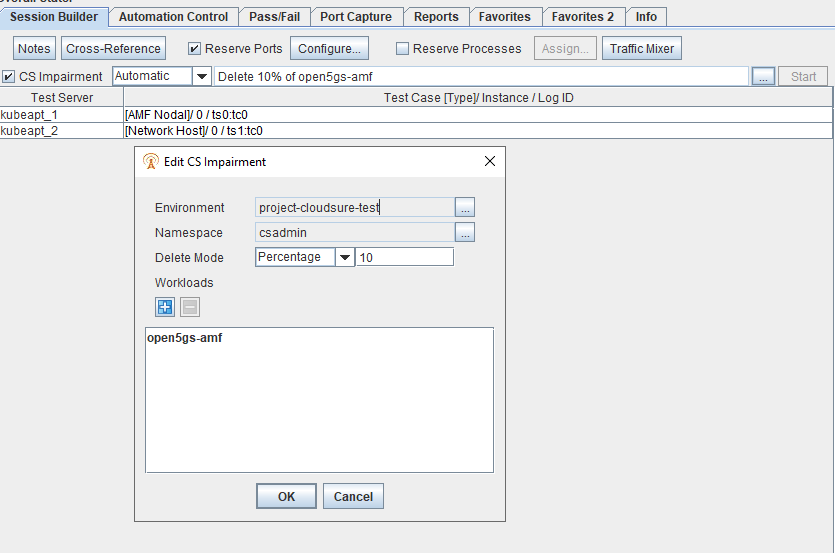
| CS Impairment |
When licensed for CloudSure into Landslide, the CS Impairment checkbox provides the ability to delete PODs in a Kubernetes cluster, while running a Test Sessions.
In order to run a test in CloudSure the test must first be saved. The TAS will use a base template of a CloudSure TestCase that can do POD Deletes and apply the configuration details stored in the CloudSure Test Profile. The CS TestCase is temporary and we will give it a standard name "RID-<NNNN> Landslide Impairment". As part of final test cleanup, we will always delete the TestCase from CS. Since only one TAS will control one CS system, and since RID is unique at any given time, using RID-NNNN in the name will provide 100% uniqueness. When a Test Session is started, the CloudSure Profile will be re-validated, querying CloudSure to make sure the configuration is still valid. Additionally if the profile is using the Delete Mode=Count, the TAS will query CloudSure to determine how many PODs are in the selected Workloads and the validation will fail unless the number of PODs >= the Delete Count.
If validation is successful the Test Session will be allowed to start.
Two modes are offered, Manual and Automatic.
The TAS will connect one single CloudSure endpoint and login with one username global to they system, app to app. When you execute CloudSure, the only feedback you get is in the Run Log, where the is a log when starting CloudSure and then querying status shows three details, the Status, the Results, and the Message. They are only reported when one of them changes. In this example the CloudSure Impairment worked and did not report any issues.
Setup: CloudSure must be setup with: The User, Organization, Project, Cluster Profile (new CS feature, if ready in time), Environment Profile, Credential Manager. Setup CloudSure with the required settings: CloudSure global settings will be via TAS Settings for now: aion_endpoint http://10.71.20.12:37022 -- |
||||||||||||||||||||||||||||||||||||||||||||||||||||||||||||||||||||||||||||||||||||||||||||||||||||||||||||||||||||||||||||||||||||||||||||||||||||||||||||||||||||||||||||||||||||||||||||||||||||||||||||||||||||||||||||||
| TS Admin | Use the TS Admin button as a shortcut to access the Test Server Administration window. | ||||||||||||||||||||||||||||||||||||||||||||||||||||||||||||||||||||||||||||||||||||||||||||||||||||||||||||||||||||||||||||||||||||||||||||||||||||||||||||||||||||||||||||||||||||||||||||||||||||||||||||||||||||||||||||||
| Control Buttons | Use the test case control buttons to add, remove, edit, or save a test case, or right-click a test case to access the Test Case menu. | ||||||||||||||||||||||||||||||||||||||||||||||||||||||||||||||||||||||||||||||||||||||||||||||||||||||||||||||||||||||||||||||||||||||||||||||||||||||||||||||||||||||||||||||||||||||||||||||||||||||||||||||||||||||||||||||
| Right-click options on a test case |
Use the right-click options on a test case to display a drop-down list with these options:
|
||||||||||||||||||||||||||||||||||||||||||||||||||||||||||||||||||||||||||||||||||||||||||||||||||||||||||||||||||||||||||||||||||||||||||||||||||||||||||||||||||||||||||||||||||||||||||||||||||||||||||||||||||||||||||||||
| Right-click on a test case when its Running | When the test session is running, you may right-click on any of the test cases in the grid to display an Action Menu with options: Init, Start, Stop, Cleanup. Use Directly Command Test Case panel to Init/Start/Stop and Cleanup already running tests cases. See Monitoring the Test Progress to understand the Test Session state during execution. |

Learn More About: