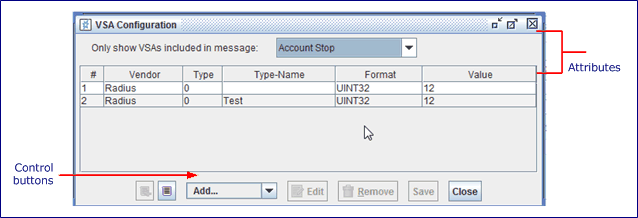
VSA/AVP Configuration Windows
Use the VSA Configuration or AVP Configuration windows to define the optional RADIUS or Diameter attributes that are included in the messages sent during a AAA test. You can include attributes from the Basic VSA Template Library, Basic AVP Template Library, or create new attributes.
-
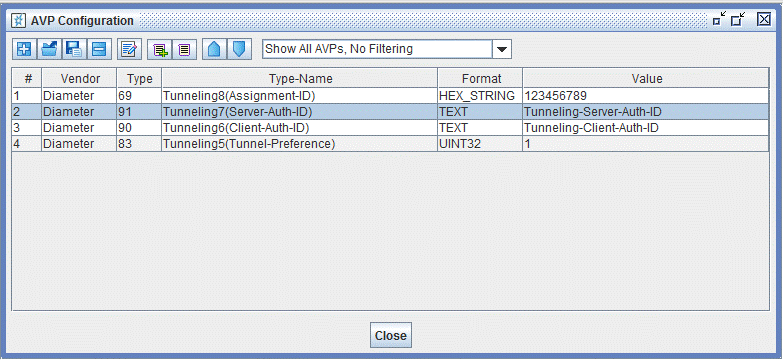
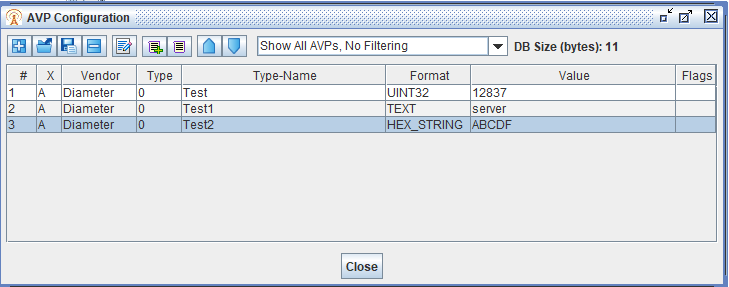
Attributes are displayed in a grid identifying the vendor and the field definitions (when you select to Show All VSAs/AVPs, No Filtering from the dropdown list Only show VSAs/AVPs included in message).
-
Select Add to add from template a VSA/AVP message from the library, New to create a new VSA/AVP message From Template to selected from a saved template and change as required..
|
NOTES:
|
-
Select an attribute and Edit the definition, Remove it from the test case, or Save the template in the Global Template Library.
-
Use the Close button to accept the configuration.
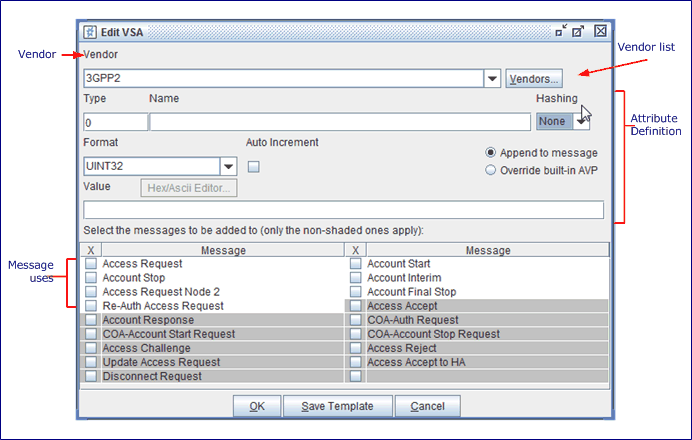
Edit Attributes
Modify existing VSAs and AVPs or define new attributes with the editing windows. These windows also give you access to the Vendor ID Assignments window, where you can manage the vendor list.
Edit VSA window components:
-
Select a Vendor with the drop-down list.
-
Click Vendor... to open the Vendor ID Assignments window and select/manage Vendor ID.
-
Define the attribute type, the value type and value used with the parameters.
-
-
Select the Hashing algorithm to be used. Choices include MD5, SMD5 (Salt MD5), or None.
-
Select Format to identify the Value type which determines how the Value will be formatted in the message. Select auto-increment to configure the value to increment with every MS session, where applicable.
-
Select to indicate whether you would like the message to be always appended to the AVP to the message or override built-in AVP (if not built-in AVP, to add the AVP to the message)
-
Select the messages in which the attribute will be used with the checkboxes. The type of messages available depends on the test case: request messages are available in the AAA Server Nodal test case, and response messages are available in the AAA Server Node test case.
-
-
Save the attribute as a VSA template.
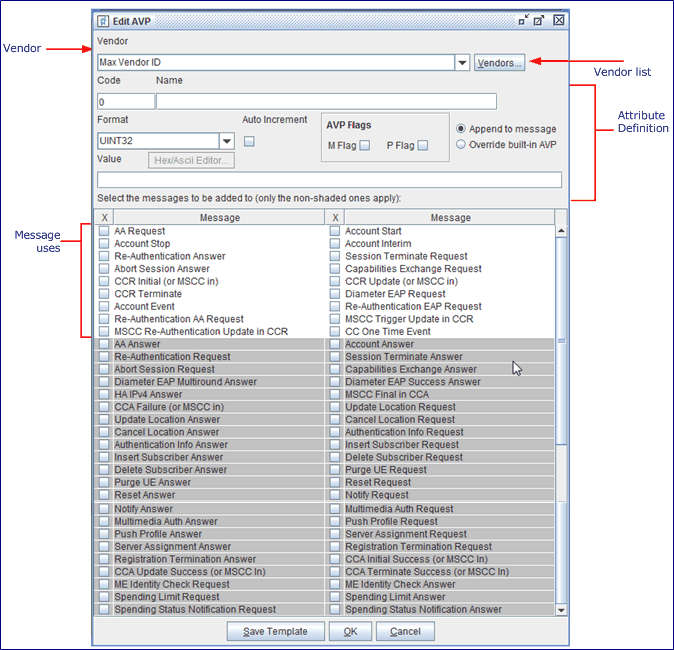
Edit AVP window components:
-
Select a Vendor with the drop-down list.
-
Use Vendor to open the Vendor ID Assignments window.
-
Define the attribute type, the value type and value used with the parameters.
-
-
Define the AVP Code Type and code Name used to identify unique AVP (with the Vendor ID).
-
Select Format to identify the Value type which determines how the Value will be formatted in the message. Select auto-increment to configure the value to increment with every MS session, where applicable.
-
Select to indicate whether you would like the message to be always appended to the AVP to the message or override built-in AVP (if not built-in AVP, to add the AVP to the message)
-
In DCCA Server Node only, use Only in these message instances (e.g., 1, 3-4, 8- ) to include different AVPs in each/different instances of the message .
-
Select the messages in which the attribute will be used with the checkboxes. The type of messages available depends on the test case: client messages are available in the AAA Server Nodal test case, and server messages are available in the AAA Server Node test case.
-
When Select Remove built-in-AVP is chosen, enter the Vendor, Code, Name, Format and Value. If a match is found with a built-in AVP the test server will remove the AVP from the message.
-
-
Save the attribute as an AVP template.
VSA/AVP Bit Meanings
Messages are bit masks. Add all the message values together Or if using bits, OR the bits together.
See the Landslide Tcl API Object and Perform Function Reference, go to the Parameter Class Vsa/AVP section for additional information.