Defining a Message
With the Advanced Data feature, you can define the content of the messages sent by a Data Message Flow using the Message Editor window... When you use one of the pre-defined Data Protocols, you define the message payload. When you use the custom protocol, you define both the protocol header and payload in the message.
IMPORTANT: The test does not validate the headers and content, other than the optional verification by the receiving end. As far as the test is concerned, the successful delivery of a message is a successful transaction, regardless of whether an identical message would be recognized as valid by a "real" client or server. Data header definition does become important, however, if there is a device in the data path between the MN and the Network Host that inspects packets for content billing or filtering. In this case, header integrity and validity may be required in order for the packet to be accepted and forwarded to its destination. |
In general, defining a message consists of the following steps:
TIP: Rather than defining a message from scratch, start with one of the default DMFs and modify it to suit your purpose. |
Before you define a message, you should have a basic understanding of:
The protocol to be used (Advanced Data protocols are briefly explained here)
To open the Message Editor window:
Click the View/Edit button on the Client side of the Command control to define a client message, or on the Server side to define a server message. The button is only enabled if a Request or Response Message has been selected.
To define the message content:
The data protocol and type of message determine which method you will use to define the message: literal message content defined on the Hex-Ascii or Text Editor sub-tabs with or without dynamic values, filler data consisting of padded bytes or the contents of a file, or both.
Custom protocol — Use the editing sub-tabs to define packet headers. Define text-based fields on the Text Editor sub-tab and hex or binary encoding on the Hex-Ascii sub-tab.
Application-level control messages — You can define the control portion of request or command messages and responses (login, retrieve, list, etc.) using either of the editing sub-tabs as required by the protocol.
Data transfer messages — Use Filler Data to form the payload of a data transfer message such as an FTP file transfer, an email message transfer, or an RTP stream, and add any encoding required with the editing sub-tabs.
With the Text Editor, you can enter the message content as you would in any text editing program. When you start a new line, the LF code is inserted automatically.
On the Hex-Ascii tab, you can add bytes to the message and define their values. The bytes are displayed in a row/bit position grid, and the ASCII translation of each row is displayed to the right of the grid.
Select a byte and enter its value. You can edit the hex value in the grid or the ASCII characters in the right column.
Switch between overwrite and insert modes with the Mode button or the Insert key.
 With either of the editing
sub-tabs, you can use these methods to define the content:
With either of the editing
sub-tabs, you can use these methods to define the content:
Paste from your clipboard into either tab by right-clicking at the insertion point and selecting Paste from the context menu. If the clipboard contains only 0-F characters and spaces, you will be prompted whether you want to paste the contents as ASCII or Hex. When you right-click PASTE in either the Text Editor or the HEX/ASCII Editor, and the clipboard contains only LFs as new lines, you will be prompted to choose CRLF or LF as your new lines.
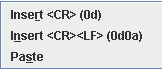
Insert a CR code or a CR-LF pair, if necessary, with the Insert CR or Insert CRLF buttons or by right-clicking and selecting one of the options from the menu. Most text-based protocols require that a message is terminated with a CR-LF pair.
NOTE: On both the HEX/ASCII and Text Editor tabs, there is a "All CRLF" button (and a right-click option), that will reformat all solo "CR" or "LF" to "CRLF". |
Paste the contents of a file into either tab by importing the file with the Browse button.
Click Browse, and navigate to the file's location in the Select window.
Select the file and click Import. If the file contains only 0-F characters and spaces, you will be prompted whether you want to import the file as ASCII or Hex. Any existing message content will be overwritten by the imported content.
Insert dynamic values in a message with Auto-Fill Fields.
NOTE: The portion of the message defined on the editing sub-tabs, excluding Filler Data but including bytes inserted by Auto-Fill Fields, is limited to 1500 bytes. If you attempt to import or paste a larger message, only the first 1500 bytes (1500 ASCII characters or 3000 hex characters) will be inserted. |
Select either the Automatic or Test Data File radio button in the Filler Data pane. Automatic filler pads the message with the character "Z" for the specified number of bytes. Test Data File inserts the contents of a file in the message.
Enter the starting byte number in Content Start. Enter 0 to insert the filler at the beginning of the message, for example. The byte that you define is highlighted in the Hex-Ascii sub-tab. If there is any literal content defined on the editing sub-tabs at or after the starting byte, it will be appended to the filler.
If you chose Automatic, enter the total number of bytes for the message in Content Size. The difference between Content Size and the number of bytes defined on the editing sub-tabs determines the number of padding bytes added to the message.
If you chose Test Data File, the file that you will use must first be imported into your system (see Managing Test Data Files for instructions).
Click the Select... button and the Select Test Data File window opens.
Select the Library section from the drop-down list.
Select the data file from the File drop-down list and click OK. The file name is displayed next to the Select... button.
If you have defined header fields in the editing sub-tabs and the total message size will be larger than the Segment Size, you can include the headers in every packet by checking Include All Data Before Content Start As Header In Every Segment.
Check Receiving end should verify message, and enter the First byte to check and Number of bytes to check. Those bytes will be highlighted in the Hex-Ascii sub-tab. When the other side receives the message, it will inspect the bytes that you specify and ensure that they match the defined message.
If verification fails, the packet is discarded by the receiving end, and the Total Packets Invalid counter is incremented.IMPORTANT:
When a message with the correct protocol is received and it does not match the expected response defined in the current Command control, the test will compare the message to all responses defined in any subsequent Command controls in the DMF. If it finds a response that is not verifiable (verification is disabled), the test assumes that the received message is a valid response for that Command control.
The range of bytes must be within the Segment Size defined for the DMF. Verification can only performed on the first packet of a multi-packet message.
Enter the number of milliseconds to wait before sending the message in the Send Delay field.