Configuring Your Java Settings
The client application runs in a Java application that is downloaded to your machine. For the best performance, your machine should meet the client recommendations. The client runs in the Java Runtime Environment (JRE) using a plug-in that is installed in your browser with the JRE.
You'll need to make the following preparations in order to run the client:
-
Configure proxy support (optional)
After you've configured your Java environment, close your browser windows and open a new window so that the changes can take effect, and then start the Landslide Client.
|
TROUBLESHOOT: If the Landslide Client fails to start when you attempt to log in from a Windows PC, follow the steps below to resolve the problem. |
-
Go to the Troubleshoot Clients page / http://TASIP/clienthelp.html. The page will open in a new window.
-
Scroll down to Java Plug-in Download Links link and follow the instructions there to download and install the JRE for your operating system.
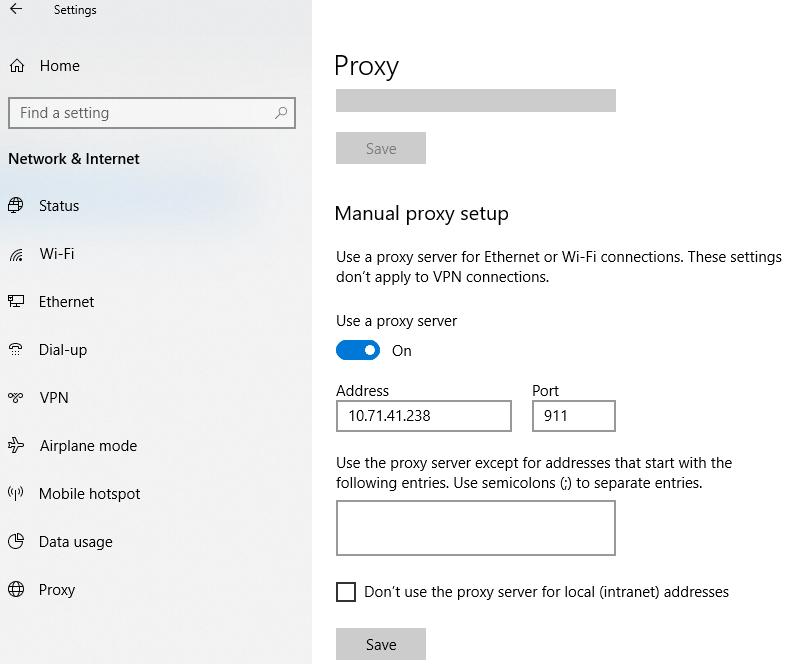
If a proxy server is between your machine and the Landslide Manager, you can use the Java Control Panel to define the proxy information for the application. Here are some links on setting up proxy:
|
TIP: By default, Java uses your browser settings. If your browser is correctly configured, there is no need to separately configure Java. Standalone Client can also use Proxy - Standalone Client and Standalone TAS Manager Console |
-
Open your control panel, and the Java control. The Java Control Panel window will open.
-
On the General tab, click the Network Settings... button and the settings window will open.
-
To manually identify the proxy server, click the Use proxy server button, enter the server's Address and Port in the fields provided, and check the Bypass proxy server for local addresses box. You can use the Advanced... settings if necessary to define different addresses and ports for different protocols and define an exception list for other Java applications that should not be routed through the proxy server.
-
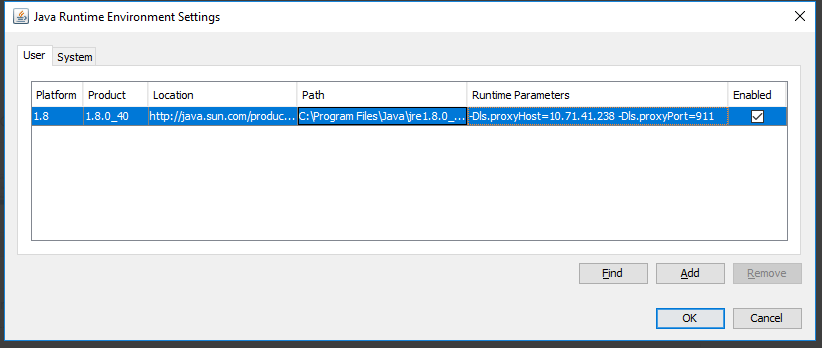
Go to Java tab - Click the view and add in the Runtime parameters - -Dls.proxyHost=IP Address of your proxy -Dls.proxyPort=Port of your proxy :

-
If a configuration script is available, click the Use automatic proxy configuration script button and enter a path or URL for the script in the Script location field.
-
OK the Network Settings and Java Control Panel windows. Refer to : https://www.java.com/en/download/help/proxy_setup.xml
-
Or you can configure by OS :

-
Or Run Java via bat file with this runtime parameter specified : java -jar -Dls.proxyHost=10.71.41.238 -Dls.proxyPort=911 landslide_client.jar Use your IP Address and port of your proxy -Dls.proxyHost=IP Address of your proxy -Dls.proxyPort=Port of your proxy
Follow the steps below to delete all of the application and resource files that Java has downloaded to your machine. If there are other application files that you want to keep, follow the second set of instructions.
-
Open your control panel, and the Java control. The Java Control Panel window will open.
-
Click the Delete Files... button in the Temporary Internet Files pane on the General tab.
-
In the Delete Temporary Files window, all types of temporary files are selected by default. You can clear the Downloaded Applets checkbox as shown in the example since Landslide does not use applets.
-
Click OK and the selected file types are deleted.
Alternatively, you can manually select the application files to be deleted.
-
In the Java Control Panel, click the Settings... button in the Temporary Internet Files pane on the General tab and the Temporary File Settings window opens.
-
Click the View Applications... button to open the Java Application Cache Viewer.
-
Delete any and all Landslide applications by selecting the application and clicking Remove Selected Application.
You can also follow these instructions to manually clearing Java Cache
- Close all Landslide clients and other Java applications.
- Delete the Java cache subfolders:
On Windows by deleting everything under the following folder:
C:\Documents and Settings\[username]\Application Data\Sun\Java\Deployment\cache\6.0 directory.
On Linux by deleting everything under the following folder:
~/.java/deployment/cache/6.0
After you have deleted the files using either method, restart your browser and try to log in. If you are still having problems, enable the Java Console.
The console displays error messages that may be useful in troubleshooting client problems.
-
Open your control panel, and the Java control. The Java Control Panel window will open.
-
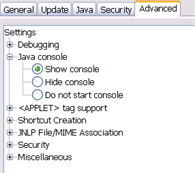
Select the Advanced tab.
-
Expand the Java console item in the Settings list.
-
Click Show Console and then click OK.
-
When you attempt to log in, the Java Console window will open and display status messages and any errors encountered.
After the problem is resolved, repeat the steps above and select Hide console to return to normal operation.
