Upgrading your Test Servers


Use the Test Server Administration window... to install new software on the test server. Normally, you install new test server software when you install a system release on the TAS. You may also upgrade individual Test Server or upgrade all Test Servers in your system. If you system is licensed for LS mX, you may choose to maintain a Test Server with the selected TS Version image.

Stand-alone test server software may be issued by Technical Support as a maintenance load to fix a problem, or as a debug load to aid in troubleshooting a problem.

To upgrade a test server:

1.

Look up the test server...

2.

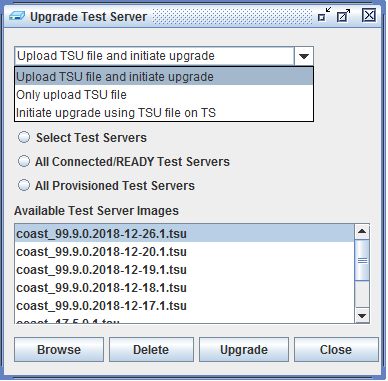
Click Upgrade (on the Test Server Administration window) to begin the process. The Upgrade test Server window displays. Select your option and click Upgrade.

NOTES:

  • The Upgrade TS button is only available when the test server is in a Ready status. If the status changes to Ready while the administration window is open, click Refresh to enable the Upgrade TS button.

  • You should always upgrade to the official test server software unless instructed to do otherwise by your customer service representative.

  • When setting up a Test Server (TS) to communicate to a TAS, ensure that the TS version is compatible with the TAS version (within one or two GA versions of each other).  If the versions are too different, there may be issues with TAS / TS communications and the TS may not register properly. The TS version can be retrieved by running the display-ts-version command at the command line on the test server. The TS should be upgradable from the Client as long the TS can be reached from TAS by SSH. If independent upgrade of the TS is needed, the upgrade-ts CLI Command Line Interface Commands can be used.

Upload TSU file and initiate upgrade

You can choose to upload your TSU file separately from upgrading your Test Server. In addition, you can selectively pick which Test Server (s) to apply your choice to (see Select Test Servers below). For example, you can upload the TSU to a group of related Test Servers while letting testing go on for another group of Test Servers.

Options: Upload TSU File and initiate upgrade (legacy way) , Only upload TSU file , Initiate upgrade using TSU file on TS

NOTES:

  • If you "Initiate upgrade using TSU file on TS" and the TSU is not there, you will get an error.

  • It is up to the user to keep track of which TSU file is uploaded, the system does not keep track. You can easily search the RT logs to determine the last file that was uploaded from the TAS.

  • TAS will check MD5 Checksum of TSU file before upload, then check MD5 Checksum executed on the Test Server. If they do not match, it will attempt to upload the file one more time. If it fails a second time, it will continue to next step. The TAS will log messages to Real-Time log indicating that MD5 Checksum is being checked:

    • sms 2019-12-17 09:27:39 Informational SysAdmin Config TS(Don TS 93/10.71.16.92) by [email protected]: Logged in to TS
      <system> 2019-12-17 09:29:05 Informational System Upgrade TS(Coast-11.85): Calculating MD5 checksum
      <system> 2019-12-17 09:29:20 Informational System Upgrade TS(Coast-11.85): upgrade file 27% uploaded @63090KB/s
      <system> 2019-12-17 09:29:30 Informational System Upgrade TS(Coast-11.85): upgrade file 49% uploaded @52704KB/s
      <system> 2019-12-17 09:29:40 Informational System Upgrade TS(Coast-11.85): upgrade file 73% uploaded @55594KB/s
      <system> 2019-12-17 09:29:50 Informational System Upgrade TS(Coast-11.85): upgrade file 99% uploaded @60554KB/s
      <system> 2019-12-17 09:29:51 Informational System Upgrade TS(Coast-11.85): Checking MD5 checksum
      sms 2019-12-17 09:29:58 Informational Operations Upgrade Full upgrade file coast_18.4.1.2.tsu uploaded to TS 'Coast-11.85', by/for client [email protected]

  • Checksum calculations can take several seconds depending up on the size of the file and power of the TAS and Test Server.

  • The TAS timeout has been increased to 20 minutes for tsu file transfer to accommodate for very large tsu files. For example, when LTE is set as mgmt port, the upgrade of tsu file takes long time.
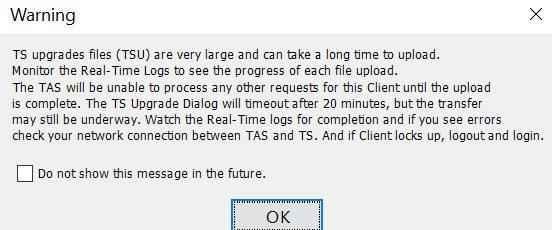
    Note: Even though timeout occurs file gets transferred in the background. You may see this Warning Message: "TS upgrades files (TSU) are very large and can take a long time to upload. Monitor the Real-Time Logs to see the progress of each upload. The TAS will be unable to process any other requests for this Client until the upload is complete. The TS Upgrade Dialog will timeout after 20 minutes, but the transfer may still be underway. Watch the Real-Time logs for completion and if you see errors check your network connection between TAS and TS. And if Client locks up, logout and login."


The official TS TSU file should be installed in the TAS when you use an Official UPG to upgrade the TAS. You will see this indication that it is the official release : official TS upgrade dialog

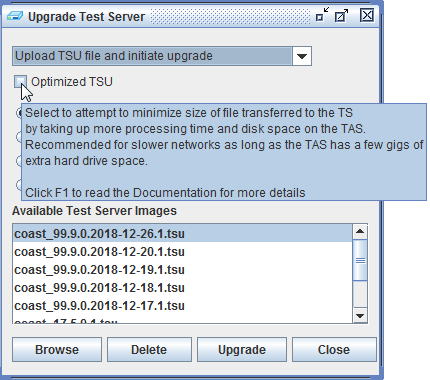
Optimized TSU

Select to attempt to minimize the size of the file transferred to the Test Server by taking up more processing time and disk space on the TAS. Recommend for slower networks as long as the TAS has extra disk space.

Default : Optimized TSU is automatically enabled

We added a Real-Time Log message that executes every 10 seconds to indicate how long the upload will take and the speed of the transfer.

Examples:

<system>              2018-12-10 11:04:48  Informational  System      Upgrade   TS(Coast-11.84): upgrade file 20053KB uploaded @19988175 KBps

or

<system>              2018-12-10 11:04:48  Informational  System      Upgrade   TS(Coast-11.85): upgrade file 5% uploaded @19988175 KBps


Upgrade the selected test Server

Selected by default and upgrades the selected Test Server with the required image.

Select Test Servers

You can select All Test Servers in the Table by checking the All checkbox or Select which servers by checking the select checkbox in the table of Test Servers. You can select multiple ranges of rows by Shift and Control + left mouse click.

You can sort by rows to organize the Test Servers by Name, Status or Version to make it easier to select groups of Test Servers.

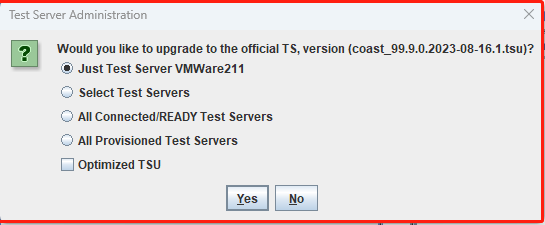
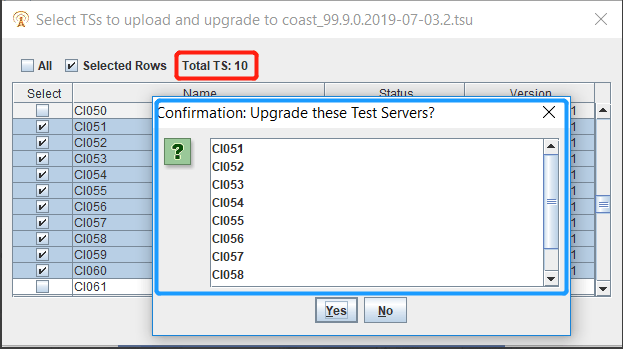
The Total TS counter will display the total number of Test Servers that will be upgraded. A confirmation page was added with the option to accept or correct the selection.


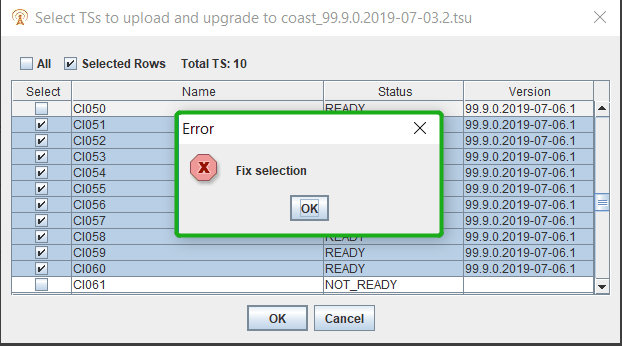
If you choose No, you have the opportunity to Fix the selection :


Upgrade All Connect/READY Test Servers

Select to upgrade all Test Servers with Status in READY mode.


Upgrade All Provisioned Test Servers

Select to upgrade all Test Servers in your system registered with the TAS.


3.

Select the required image from the list of Available Test Server Images. Click Upgrade to install the image.

NOTES:

  • You can remove old upgrade files by right-clicking the file and selecting Delete.

  • When a default image is not installed, "(Non-Default)" is appended to the version displayed in the Test Administration window.


4.

Click Browse and the Load Local TS Upgrade File window opens. Browse to the upgrade file, select it, and click Upload to begin the upload.

5.

When the upload completes, the file is displayed in the Available Test Server Images list. Select it and click Upgrade, and an upgrade confirmation message is displayed.

6.

A status / progress indication for Test Server Upgrade is now available on the Test Server Administration window. Once the Test Server (TS) Upgrade is uploaded and initiated on each TS, the TSs will start to indicate their upgrade status, even while other TSs are still having TSUs uploaded.

The "Upgrade Progress" field will only be visible when the Test Server is being upgraded and it will indicate percentage complete.  Upgrade Progress is located on the General Tab of the Test Server Administration window and also logged to the Real-Time Logs and the Info/Warnings/Errors tab - " Upgrade : 20.56%". However, on a Local Combo System you will see "100.00% Complete, Local TS Reboot Manually".

The Upgrade Status is also available via the APIs (RESTFUL and TCL) with a new UpgradeProgress Attribute on each Test Server, as well as through the normal TS Warnings list. For RESTFUL API through the api/systemlogs query as well.


When the Test Server reboots, you may see " Cannot connect possibly rebooting" in the Upgrade Progress value.


The new software is loaded and the test server is restarted. When this process is complete and the test server registers with the TAS, the test server status changes to Ready.

TROUBLESHOOT: If the test server has not reached the Ready status after a few minutes, click Recycle to restart the test server.


Related Topics

  1. About Test Server Status
  2. Managing Your Test Servers
  3. System Maintenance Tasks#upgrade