UE Node Email Message Setup Procedure
This is required for SMS to Email, MMS to Email, Email to SMS, and Email to MMS. VisionWorks MTS will test email functionality/latency using handset’s main account.
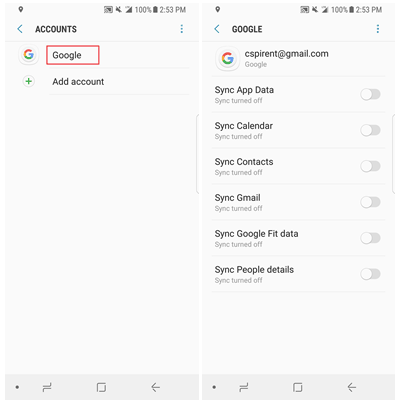
Not Required, but recommended to turn off all Sync, especially, Sync Gmail. This will prevent constant mail notifications during testing.
| NOTE: UE Node Email testing only supports Gmail Addresses. |
Initial Setup of Email Account
1. Setup Gmail account: |
Go to:
|
|
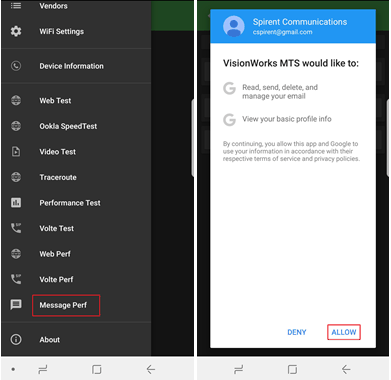
2. Authorize VisionWorks MTS for Gmail Access: |
For Message EMAIL testing, VisionWorks MTS will utilize Android’s native Gmail API for sending and receiving email. This allows for faster response time compared to POP3/IMAP protocol. In order for VisionWorks MTS to have access to Handset local account, user must grant permission. This is a one time requirement during initial setup.
|
|
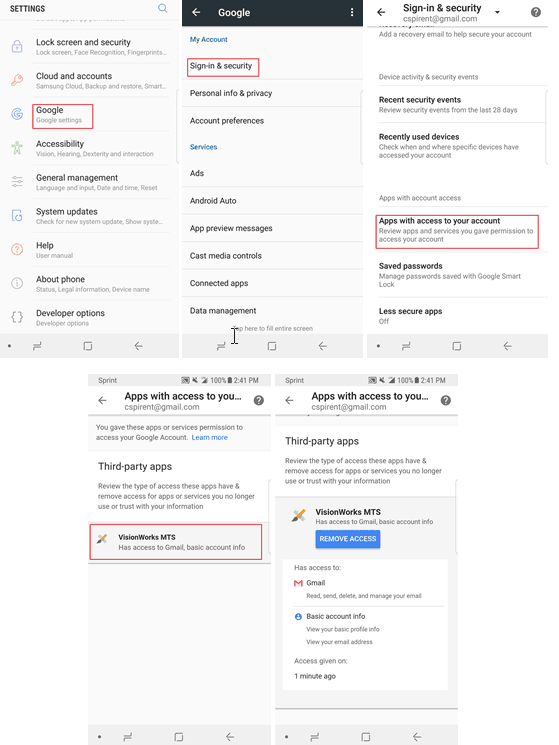
3. Verify VisionWorks MTS has been authorized: |
|
|
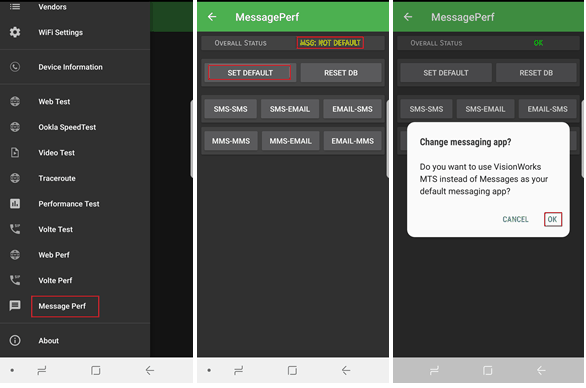
4. VisionWorks MTS as Default Message Application: |
This will be done automatically when a UE “Upgrade” in executed in Test Server Administration. However, to perform the steps manually, go to:
|
|
5. Verify SMS/MMS/EMAIL Functionality: |
Follow
these steps to verify VisionWorks
MTS can send/received SMS/MMS/EMAIL.
|